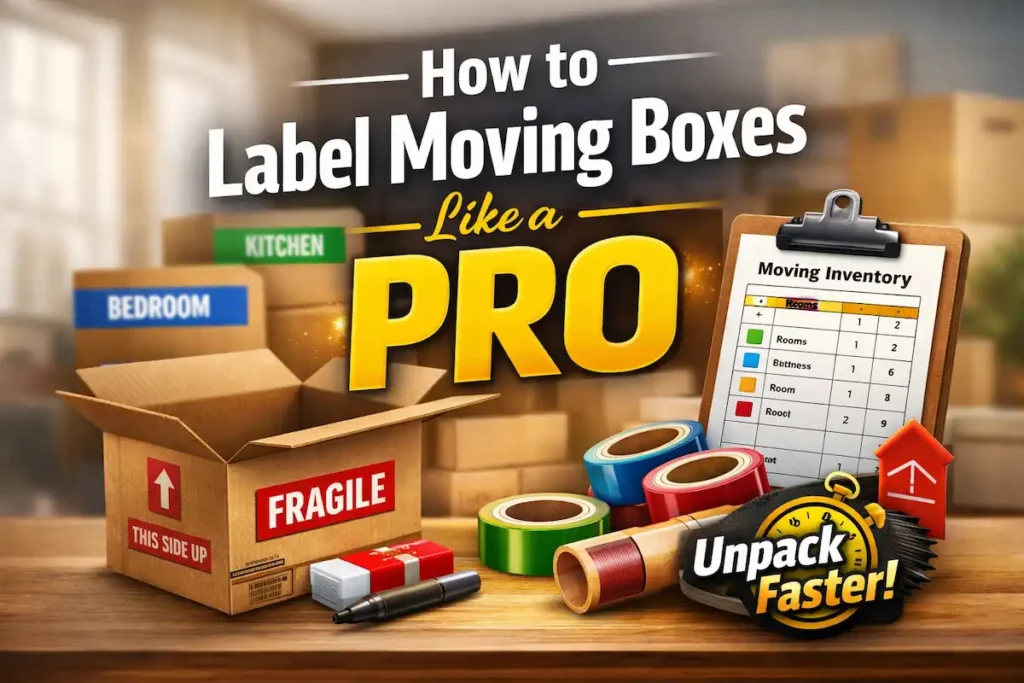
Professional movers follow a box labelling system on every single job. Not because it is a formality, but because it is the single most effective tool for controlling chaos on moving day and cutting unpacking time in half. A correctly labelled box tells the mover exactly which room to put it in without asking. It tells you exactly what is inside without opening it. It tells the crew to handle it with care, keep it upright, or unload it first — all at a glance.
Unlabelled boxes, by contrast, all look identical once sealed. Every unlabelled box becomes a guessing game during unloading. The entire crew must stop and ask, or worse, place everything in one room and let you sort it later. Unpacking an unlabelled move can take days longer than a labelled one.
This guide covers the complete professional labelling system: the materials required, what to write and where to put it, the three most effective labelling methods, how to label fragile and priority boxes, and the one labelling action that most people do too late.
About Alliaance Packers And Movers: We have provided packing and shifting services in Lucknow since 2013. As trusted packers and movers in Lucknow, every Alliaance box is labelled with destination room, contents, and handling instructions before it leaves the packing station. Call +91 7398073201 for a free pre-move survey.
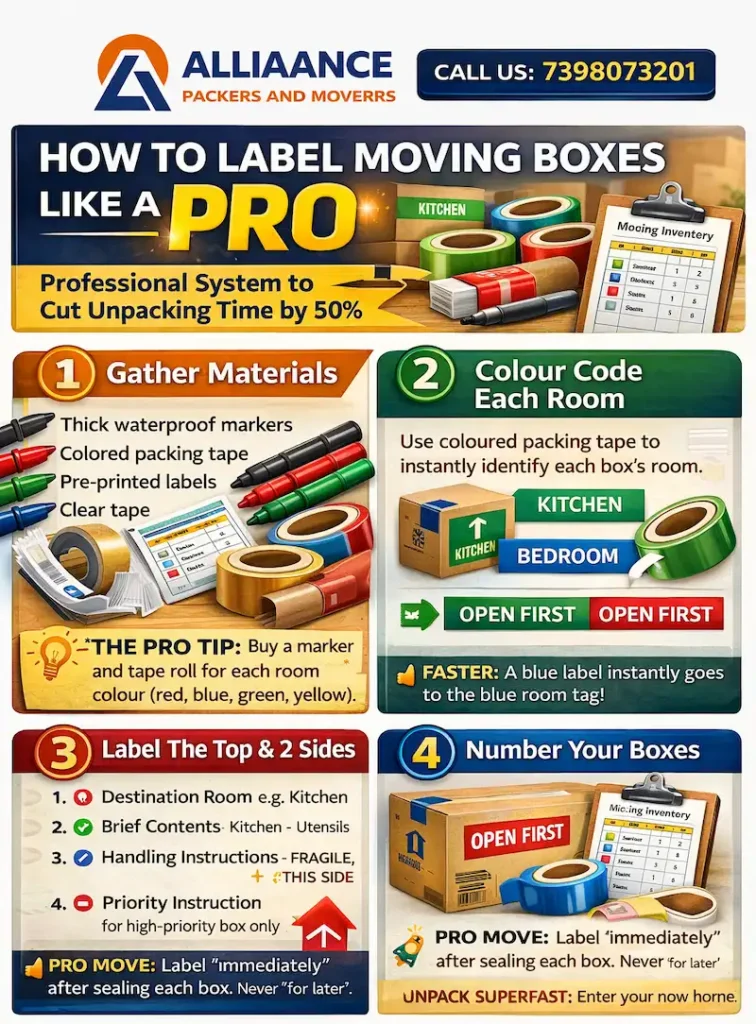
Labelling Materials: What You Need Before You Start
Labelling materials are inexpensive and available at any stationery or hardware store. The quality of your markers and labels directly determines how readable your boxes are throughout the move — including after handling, possible moisture exposure, and the inevitable stacking in the truck.
Material | Purpose | Key Notes |
Waterproof permanent markers (thick nib, multiple colours) | Primary writing tool for all box labels | Thin markers produce labels difficult to read from a distance. Use thick-nib permanent markers. Waterproof ensures labels survive rain, humidity, and handling without smearing. Buy one per room colour if colour-coding. |
Coloured packing tape | Colour-coding system: different colour tape per room | Apply a strip of coloured tape across the top and one side of each box to instantly identify its destination room. More visible than coloured markers alone. |
Pre-printed adhesive labels | Standardised, professional-looking labels | Available from stationery shops and moving supply stores. Include fields for room, contents, and handling instructions. Save handwriting time. Combine with clear tape over the label to protect it. |
Clear packing tape | Protecting labels from moisture, smudging, and tearing | Apply a strip of clear packing tape over every written or printed label. Labels that peel off or become unreadable mid-move defeat the entire system. |
Notebook or moving inventory sheet | Recording the master inventory list for numbered boxes | One page per box in numbered system: box number, room, and contents. Keep the original + take a photo for a digital backup. Email the list to yourself. |
Coloured paper or coloured card | Posting room identification signs at the new home | A sheet of red paper on the bedroom door + red tape on bedroom boxes = movers know exactly where red boxes go without any instruction. |
⚠ Avoid using a single black permanent marker for everything. Same-colour labels mean movers must read every box to know where it goes. Colour differentiation allows placement at a glance — the single biggest speed improvement in any move.
What to Write on Every Moving Box: The Five Elements
A complete box label contains five elements. Not all five are required on every box, but every box should have at least the first two. The more information a label carries, the faster and more accurately the box reaches its correct destination and gets unpacked in the right order.
| Element | What to Write | Example | Every Box? |
| 1. Destination room | The specific room in the NEW home where this box belongs. Use specific names, not vague ones. | Master Bedroom | Kitchen | Children’s Room | Home Office | Yes — always |
| 2. Contents description | A brief, specific description of the main items inside. Not every item — just the key ones. | Plates, Bowls, Cups | Winter Clothes | Books – Fiction | Laptop + Charger | Yes — always |
| 3. Box number | A unique sequential number if using the numbering system. Format: ‘Box 7 of 42’ or ‘Kitchen 3/8’ | Kitchen 3/8 | Box 12 | Living Room 2/5 | Yes — in numbering system |
| 4. Handling instructions | Special care instructions relevant to the box contents. | FRAGILE | THIS SIDE UP ↑ | HEAVY — TEAM LIFT | DO NOT STACK | Yes — for any box needing special handling |
| 5. Priority / loading instruction | Unloading sequence information for high-priority boxes. | OPEN FIRST | ESSENTIALS | LOAD LAST – UNLOAD FIRST | Yes — for Day 1 essentials box only |
How specific should contents descriptions be?
Specific enough to tell you what is inside without opening the box, but brief enough to be written in 5–8 words. Compare these:
| Too vague | Better | Best |
| Kitchen | Kitchen – Utensils | Kitchen – Cooking Utensils, Ladles, Tongs |
| Clothes | Bedroom – Clothes | Bedroom – Winter Jackets + Woollens |
| Books | Study – Books | Study – Books: Fiction A–M |
| Bedroom stuff | Master Bedroom – Linen | Master Bedroom – Bed Sheets, Pillow Covers |
| Fragile | Kitchen – Fragile | Kitchen – Wine Glasses – FRAGILE |
💡 List the most important or fragile item first in your contents description. If a box contains fine china alongside everyday plates, write ‘Fine China, Everyday Plates’ so handlers know immediately that extra care is required before they read the word FRAGILE.
Where to Place Labels on the Box: Placement Rules
The best label in the world is useless if no one can see it. Box placement in moving trucks, storage units, and rooms means boxes are routinely stacked, rotated, and handled from every direction. A single label on the top is invisible when the box is in a stack. A single label on one side is invisible when that side faces the wall. Professional movers label at least three surfaces: the top and two sides.
Surface | When It Is Visible | Priority |
Top of the box | When boxes are stacked in a pile on the floor; when movers scan a stack from above | Always label the top |
Front-facing side | When boxes are in a row along the wall or in the truck; the surface that faces you when walking by | Always label at least one side |
Second side (adjacent) | When boxes are turned or rotated; when a stack faces a different direction at the destination | Label a second side perpendicular to the first |
Bottom of the box | Never — do not write on the base; movers cannot see it and labelling there risks confusion with handling direction | Do not label |
Practical placement rules
- Write the room name and box number on the top AND at least two sides of every box
- Do not place labels over box seams or corners — labels on edges peel off and tear during handling
- Apply clear packing tape over every written or printed label as protection against moisture, smudging, and tearing
- Write in large, bold letters visible from at least one metre away. If in doubt, your letters are too small.
- When reusing old boxes: cover all previous labels with blank paper or a new label taped over them. Old labels cause dangerous confusion when movers misread a box’s destination.
⚠ Labelling only the top of a box is the most common labelling mistake. Boxes are stacked with other boxes on top, turned sideways in the truck, and placed against walls. Without side labels, an entire layer of boxes becomes unidentifiable until re-stacked or rotated. Always label the top AND two sides.
The Three Professional Labelling Systems: Which One Is Right for Your Move?
There are three main box labelling approaches used by professional movers. Each has strengths and the right choice depends on the size of your move, how many people are helping, and how much detail you want during unpacking.
System 1: Colour-coding by room
Assign a unique colour to each room in the new home. Use that colour’s tape or marker on all boxes destined for that room. A strip of blue tape means the box goes to the kitchen. A strip of red means the bedroom. Anyone carrying a box can place it in the correct room immediately, without reading a single word.
| Room | Colour Suggestion | Application |
| Kitchen | Red tape / red marker | Strip of red tape across top of box + room name in red marker |
| Master Bedroom | Blue tape / blue marker | Strip of blue tape across top + room name in blue |
| Children’s Room | Green tape / green marker | Strip of green tape across top + room name in green |
| Living Room | Orange tape / orange marker | Strip of orange tape across top + room name in orange |
| Bathroom | Yellow tape / yellow marker | Strip of yellow tape across top + room name in yellow |
| Study / Home Office | Purple tape / purple marker | Strip of purple tape across top + room name in purple |
| Storeroom / Garage | Brown tape / brown marker | Strip of brown tape across top + room name in brown |
Critical step: Post a coloured paper sheet on the door of each room in the new home matching the colour assigned to that room before movers begin unloading. A red sheet on the bedroom door + red tape on bedroom boxes = no confusion, no questions, no boxes placed in the wrong room.
 Write the colour key on a single sheet and give a copy to every person helping with the move. Post one copy on the door of the new home before unloading begins. Save one as a photo on your phone. Without the key in everyone’s hands, the colour system is only half effective.
System 2: Numbering with a master inventory list
Assign a unique number to every box. Write the number on the box along with the destination room. Maintain a master inventory list that records what is inside each numbered box. This is the most thorough system and the best choice for large moves or when you need to locate specific items after the move.
- Number boxes sequentially as you seal them: Box 1, Box 2, Box 3, and so on.
- Write the number clearly on the top and two sides of each box.
- On the master inventory list, record: box number + destination room + key contents. Example: ‘Box 12 — Kitchen — Coffee maker, kettle, dish towels’.
- Keep the master list in multiple places: physical copy + photo on your phone + emailed to yourself.
Sequential numbering by room: A more specific variant is to number boxes within each room: ‘Kitchen 1/8, Kitchen 2/8, Kitchen 3/8’. When unloading, you immediately know if any kitchen box is missing because the sequence is visible.
System 3: Room-based labels (simplest approach)
Write the destination room name and a brief contents description on the top and sides of every box. No colour system, no master inventory. This is the fastest approach to implement and the right choice for small moves or when you have limited time.
Best practice for room-based labels: be specific with both the room name and the contents. ‘Kitchen — Spices and Dry Goods’ is far more useful than ‘Kitchen’ alone. The room name tells movers where it goes. The contents description tells you what to open first.
Combining systems for maximum effectiveness
The most effective approach for large household moves combines all three: colour-coding for fast room identification (movers place boxes instantly), room name + contents description for unpacking clarity, and numbering with a master list for complete inventory tracking. This combination is what professional packing crews use on every large-scale move.
| System | Best For | Speed | Detail Level | Effort |
| Colour-coding | Fast room placement; multiple helpers; large move | Fastest | Low — room only | Medium — requires coloured materials |
| Numbering + master list | Full inventory tracking; locating specific items post-move; intercity moves | Medium | Highest — item by item | High — requires maintaining list |
| Room-based labels | Small to medium move; limited materials; quick setup | Medium | Medium — room + brief contents | Low — just write and pack |
| Combined (all three) | Large household moves; professional standard | Fastest with full detail | Highest | Medium-high |
How to Label Fragile, Heavy, and Special-Handling Boxes
Standard room and contents labels tell movers where a box goes. Special-handling labels tell them how to handle it. These labels protect both the contents and the people carrying the boxes. They should always be written in a contrasting, bright colour — red or bright orange — so they are impossible to miss even when a box is in a stack.
Label | When to Use | Where to Write | Colour |
FRAGILE | Any box containing breakable items: crockery, glassware, mirrors, electronics, decorative items | All 4 sides and the top | Red or bright orange |
THIS SIDE UP ↑ | Any box where orientation matters: glassware, electronics, liquids, anything that must remain upright | All 4 sides and the top, with an upward-pointing arrow | Red or bright orange |
HANDLE WITH CARE | Additional instruction for very fragile or high-value items in conjunction with FRAGILE | 2–3 sides | Red |
HEAVY — TEAM LIFT | Any box exceeding approximately 20 kg: books, canned goods, tools, weights | Top and two sides in large letters | Black or red |
DO NOT STACK | Boxes where stacking weight would damage contents: mirrors, artwork, large electronics | Top in large letters | Red |
GLASS | Boxes specifically containing glass items, in addition to FRAGILE | All 4 sides | Red |
ELECTRONICS | Boxes containing sensitive electronics where the crew should take extra care with temperature and impact | Top and two sides | Blue or black |
Fragile label placement rule
Write FRAGILE on all four sides, not just the top. Boxes are constantly rotated, stacked, and placed against walls during a move. A FRAGILE label on the top alone is invisible when the box is on its side in the truck or when a mover picks it up from the side. The label must be visible from every angle of handling.
💡 Use red or neon sticker labels printed with FRAGILE in addition to writing it by hand. The combination of a pre-printed red sticker + handwritten instruction on multiple sides makes fragile boxes unmistakable to any mover regardless of experience.
The Open First Box: Pack One, Label It Prominently
No matter how well-labelled every other box is, there is one box that must be immediately accessible the moment you arrive at your new home — the Essentials box, also called the Open First box. This is the one box you will need before any unpacking begins.
What to put in the Open First box
| Category | Items to Include |
| Toiletries | Toothbrush, toothpaste, soap, shampoo, toilet paper |
| Medications | All prescription medications, first aid essentials |
| Phone and device charging | Phone chargers, power banks, USB cables |
| Clothes | One change of clothes per person; nightwear |
| Kitchen basics | One kettle, tea/coffee, mugs, a small pan, basic utensils, snacks |
| Documents | ID documents, house keys, lease/ownership papers |
| Children and infants | Nappies, feeding items, one set of clothes, favourite toy |
| Tools | Screwdriver (for reassembling furniture), scissors, utility knife |
How to label the Open First box
- Use the brightest available colour tape or marker — a colour not used for any room in the colour-coding system
- Write ‘OPEN FIRST — ESSENTIALS’ in large bold letters on the TOP, all 4 SIDES, and handle with extra care
- Label the box ‘LOAD LAST – UNLOAD FIRST’ so it comes off the truck before any other box and is accessible immediately on arrival
- Keep the Open First box in the passenger vehicle with you if possible — do not put it in the truck if you can avoid it
💡 For household moves with children: pack a separate clearly-labelled Children’s Essentials box with their most familiar comfort items (favourite toy, snacks, book or tablet). Arriving at a new home is disorienting for children. A familiar box they can access immediately makes the transition significantly easier.
Creating a Master Inventory List: Your Move’s Paper Trail
The master inventory list is the reference document that connects every numbered box to its contents. It is the most powerful tool for locating items after the move, confirming all boxes arrived, and identifying missing boxes quickly.
What a master inventory list contains
Column | What to Record | Example Entry |
Box number | Unique sequential number matching the label on the box | Box 14 |
Destination room | Room in the new home where this box belongs | Master Bedroom |
Contents description | Key items inside — enough to identify box without opening | Winter Jackets, Woollens, 2 Blankets |
Fragile? | Yes / No | Yes |
Priority | Open First / Normal / Store | Normal |
How to keep the inventory safe
- Write the physical master list in a dedicated notebook, not on loose paper that can be misplaced
- Photograph every page of the master list before the move begins
- Email the photos to yourself — this creates a digital backup accessible from any device
- Share the master list with the head of the moving crew on moving day
- Keep one physical copy with you at all times during the move, not in any box
⚠ The master inventory list is useless if it is packed in a box. Keep it on your person, in your bag, or in the passenger vehicle throughout the move. Losing the master list turns the entire numbering system into unlabelled boxes.
Professional Labelling Rules: What to Do and What to Avoid
Professional Practice | Common Mistake It Prevents |
Label every box immediately after sealing it — while you still know exactly what is inside | Sealed boxes with no memory of contents; spending hours opening boxes post-move to find a single item |
Pack and label room by room — complete one room before starting the next | Boxes mixed with items from multiple rooms; unpacking chaos where nothing goes directly to its shelf |
Write specific contents, not generic category names | Boxes labelled ‘Kitchen’ that could contain anything from cookware to cleaning supplies |
Label the TOP and at least TWO SIDES of every box | Boxes stacked five-high in the truck with labels only on top; entire row of boxes unidentifiable |
Do not pre-label empty boxes with contents details | Empty boxes labelled with specific contents that then get packed with different items |
Cover old labels on reused boxes before applying new ones | Movers reading old labels and placing boxes in incorrect rooms |
Keep the labelling system consistent throughout the entire move | System confusion mid-move where some boxes are colour-coded, some numbered, and some unlabelled |
Protect all labels with clear packing tape over them | Labels that peel off in rain, humidity, or through handling; unreadable boxes on arrival |
Post the colour key on the door of each room in the new home before unloading | Movers asking ‘where does this go?’ for every box during unloading; slowing the entire process |
Mark ‘LOAD LAST / UNLOAD FIRST’ on the Open First box | Essentials box buried under 40 other boxes in the truck; inaccessible on arrival |
How Alliaance Packers And Movers Labels Your Boxes
Alliaance Packers And Movers has provided packing and shifting services in Lucknow since 2013. On every job, Alliaance boxes are labelled with the full professional system before a single box leaves the packing station.
| Alliaance Practice | Detail |
| Free pre-move survey | The room layout of both the old and new home is reviewed at the survey. Destination room names and the labelling system are confirmed before packing begins. |
| Room + contents labelling on every box | Every sealed box receives: destination room name, brief contents description, and box number. No box leaves unlabelled. |
| FRAGILE labels on fragile boxes | All fragile boxes receive red FRAGILE labels on all four sides and the top. THIS SIDE UP with arrows on all sides requiring orientation. |
| HEAVY labels on heavy boxes | Heavy boxes (books, appliances, tools) receive HEAVY — TEAM LIFT labels to protect crew from injury. |
| Open First box identification | The client’s Open First essentials box is packed last, labelled prominently, loaded last, and unloaded first on arrival. |
| Consistent labelling system throughout | One labelling system applied consistently across the entire household. No inconsistency between rooms. |
| Master inventory list | Provided on request for large household moves and all intercity shifting. |
| Payment structure | 5% at booking · 85% at loading · 10% at delivery |
 Write the colour key on a single sheet and give a copy to every person helping with the move. Post one copy on the door of the new home before unloading begins. Save one as a photo on your phone. Without the key in everyone’s hands, the colour system is only half effective.